Who loves Girl Scout cookies?
(This is EVERYONE IN THE WHOLE ENTIRE COUNTRY’s cue to raise both hands in the air and wave ’em like they just don’t care.)
Of course you love them. They’ve got that perfect mix of being delicious and unavailable going for them. Only having access to them for a few weeks each year makes you want them that much more. Kind of like when I lived in Utah and the closest Jack-in-the-Box was in St. George and every time I drove through there I got myself a Sourdough Jack and an Oreo shake because I missed them so…and now that I live in a land with Jacks on every corner I haven’t eaten there in ages. Kind of like that.
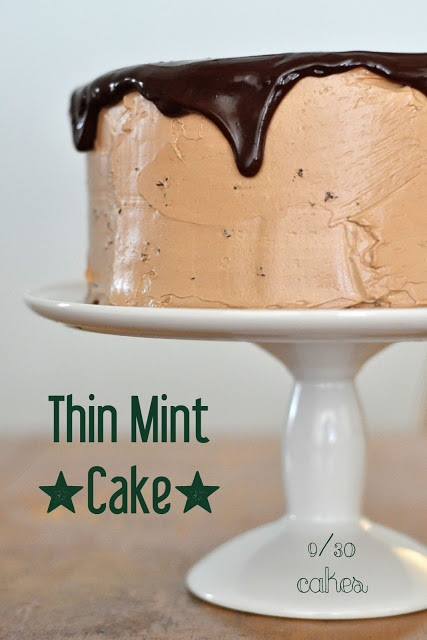
From what I have seen, Thin Mints are the Girl Scounts’ cash cow. That’s the cookie everyone swoons over and buys a case or two to keep in the freezer for a rainy day. Personally, I don’t dislike Thin Mints, but I don’t exactly miss them when they’re gone. I’m more of a Samoas girl. Lacking those, I’ll go with one of the peanut butter options. But everyone else I know is obsessed with Thin Mints. And with those people in mind, I made this cake.
(Although mostly I made it for my friend Annette, who got baptized on Saturday, and my friend Emily–Annette’s sister-in-law–who picked this cake since Annette couldn’t decide what kind she wanted.)
At any rate, you’re welcome.
Dark Chocolate Cake
adapted slightly from I Am Baker
This is the same cake recipe I used for the hazelnut mousse cake that was such a hit. The only difference between this cake and that one is that I left out the coffee flavoring, because I didn’t want it to compete with the mint. The coffee brings out a certain depth in the chocolate, but I didn’t feel the flavor of the cake was lacking without it.
1 3/4 c all-purpose flour
2 c sugar
3/4 c good cocoa powder
2 tsp baking soda
1 tsp baking powder
1 tsp salt
1 c buttermilk
1/2 c vegetable oil
2 large eggs
1 tsp vanilla extract
1 c hot (just boiling) water
Preheat oven to 350. Butter and flour two 8-inch cake rounds. Whisk dry ingredients together in one bowl; combine buttermilk, oil,
eggs, and vanilla in another. With the mixer on low, slowly add the wet
ingredient mix to the dry. With the mixer still on low, add the hot
water. Scrape down the sides and bottom of the bowl and finish mixing by hand to ensure that everything is well combined. Pour batter into prepared pans. Bake for
35-40 minutes or until inserted toothpick comes out clean. Cool in pans
for 30 minutes, then turn onto a cooling rack to cool completely.
Chocolate Buttercream Frosting
from Vintage Cakes by Julie Richardson
This frosting is the most labor intensive recipe I’ve ever used for frosting, but it was SO worth it. Light and creamy and not super greasy or sugary (which is something I loathe about most frostings), it’s perfect for this cake. Still, if you prefer something easier, go with your favorite standby recipe.
6 egg whites
1 1/4 cups sugar
1/4 teaspoon cream of tartar
2 cups (4 sticks) unsalted butter, at room temperature, cut into small cubes
2 teaspoons vanilla
1/8 teaspoon salt
5 ounces bittersweet chocolate, chopped or in chips
In the clean bowl of a hand mixer, whisk together egg whites, sugar, and cream of tartar by hand. Place bowl over a saucepan of simmering water and continue to whisk until the mixture reaches approximately 130 degrees F on a candy thermometer. (It will be very gloppy to start but will become more fluid as it heats up.)
Move the bowl to the stand mixer and, using the whisk attachment, whip the mixture on medium-high for 3-4 minutes until it is thick and glossy and holds stiff peaks (like meringue). Turn the mixer down to medium-low for another minute or two until the bowl is just cool to the touch. Kick the mixer back up to medium-high and add the butter one piece at a time. Stop and scrape down the sides of the bowl as needed. At some point, it will start to look curdled. THIS IS NORMAL. Keep mixing. Once all the butter has been added and the frosting is smooth and creamy, blend in the vanilla and salt.
Melt the chocolate and let it cool. When it is barely warm to the touch, stir together with one cup of buttercream. Add the mixture back into the rest of the frosting and whip until fully incorporated.
Mint Chocolate Ganache
adapted from Vintage Cakes
1/2 cup heavy cream
4 ounces semisweet chocolate, chopped or in chips
1 teaspoon mint extract (or to taste)
Heat cream in a saucepan until it just begins to simmer. Pour over chocolate in a heat-proof bowl and let sit for a few minutes. Whisk together until smooth and glossy. Stir in mint extract. Let ganache cool until it reaches the desired consistency.
To assemble:
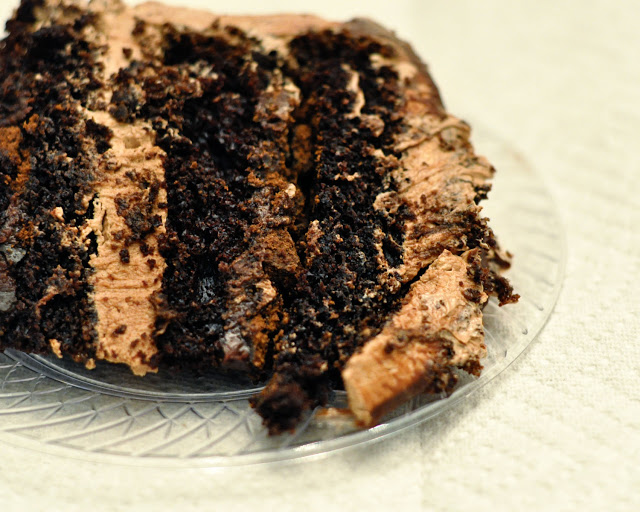
Chop 10-12 Thin Mint cookies into pieces/crumbs. Using a long serrated knife, split each cake into two even layers. (This is easier to do if you put the cakes in the freezer for half an hour or so before splitting.) Spread the first cake layer with 1/3 of the ganache and sprinkle with half the cookie crumbs. Top with another cake layer. Spread with a thick layer of buttercream. Top with another cake layer, and spread with half the remaining ganache and all the remaining cookie crumbs. Top with the final cake layer. Frost cake with remaining buttercream. Spread the rest of the ganache over the top of the cake and allow to drip off the sides. (I should’ve microwaved my ganache briefly, since it was starting to set up by the time I got to this step. I’d have liked more drippage, just because I like how it looks, but the ganache was too thick at that point for any serious dripping. Lesson learned.)
I will admit I am a thin mint girl and got entirely too excited when i saw this post! Thanks! I cant wait to try it!
If you do, let me know how it turns out!
Oh, you've made magic.
Powers. I have them.